DIY Coffee Mug Planter
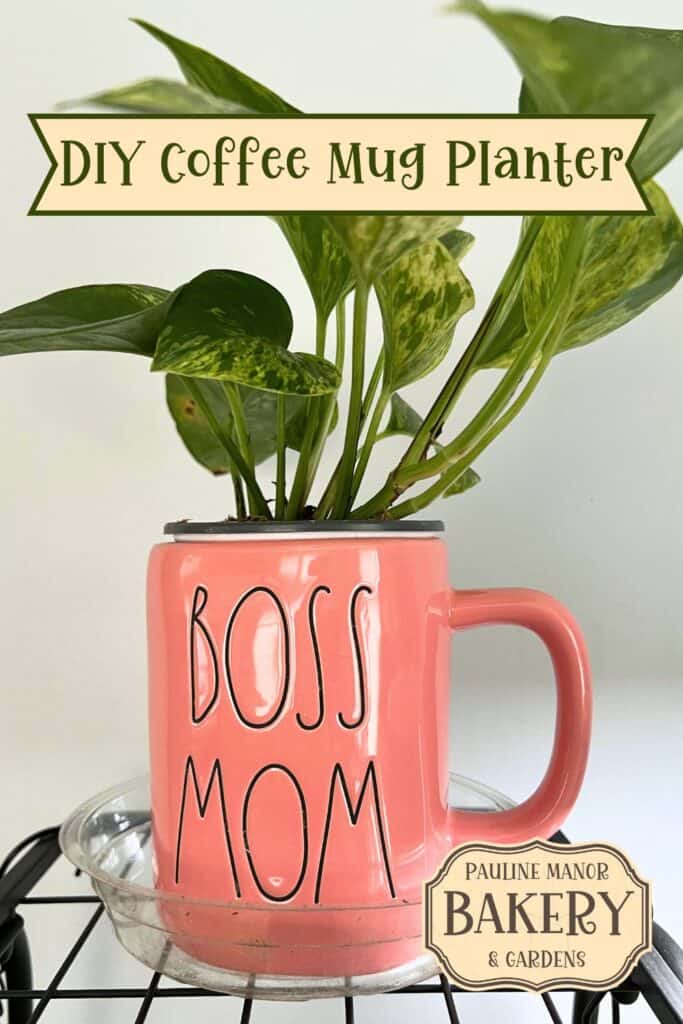
If you have an obsession with coffee mugs the way I do, you will love this simple DIY Coffee Mug Planter Tutorial! Transform your favorite mugs into a piece of art that you can display around your home or office for super cute decor.

This post may contain affiliate links, which means if you click through and purchase, I may receive a commission at no cost to you. As an Amazon Associate, I earn from qualifying purchases.
I am obsessed with how cute these turned out, and since I have so many mugs already, I can see this being how I display plants in every room of Pauline Manor. And this is the perfect gift! Unique, cute, and thoughtful!
DIY Coffee Mug Planter Tutorial
Materials You Will Need
Before diving into the process, gather the following materials:
- An old coffee mug
- Diamond drill bit for porcelain
- Power drill
- Small rocks or pebbles
- Potting soil
- A small plant or succulent
Step 1: Preparing Your Coffee Mug
The first step in creating your coffee mug planter is to prepare the mug. Ensure it is clean and dry. This project works best with ceramic mugs, as they are sturdy and can withstand the drilling process. I got into the Rae Dunn craze a few years ago, so I had fiftyleven extra mugs hanging out in a cabinet, but you can find some of the neatest mugs at your local thrift store!
Step 2: Drilling a Drainage Hole
To prevent water from accumulating at the bottom of the mug and causing root rot, it's essential to create a drainage hole. This is tough and takes a little bit of practice, but once you get the hang of it, I made a dozen planters very quickly.
Begin by putting a little bit of water on the mug to help the drill bit cut through the ceramic easily. Using a diamond drill bit for porcelain, carefully drill a hole through the bottom of the mug. I found it best to start at an angle, and go slowly to avoid cracking the ceramic.
Step 3: Adding Drainage Layer
With the drainage hole in place, add a layer of small rocks or pebbles to the bottom of the mug. This layer will facilitate proper drainage and prevent the soil from blocking the hole. If your pebbles are too small, you can put a piece of garden paper inside on the bottom to make sure they stay inside of the mug.
Step 4: Filling with Soil
Next, fill the mug with potting soil, leaving about an inch of space at the top. Potting soil is ideal because it is formulated to provide the right nutrients and aeration for plants. You can find potting soil at your local garden center or hardware store.
Step 5: Planting Your Greenery
Now comes the fun part—planting! Choose a small plant or succulent that will thrive in the limited space of a coffee mug. Succulents are a popular choice because they require minimal care and come in various shapes and sizes. I chose pothos because they are hard to kill *ahem* and I like how they trail down.
Remove your chosen plant from its original pot, gently loosening the roots. Place the plant in the center of the mug and fill in around it with additional soil, pressing lightly to ensure the plant is secure.
Step 6: Watering Your Plant
After planting, give your new coffee mug planter a good watering. Be careful not to overwater, as the small size of the mug means it doesn't hold much soil to absorb excess water. A light watering once a week is usually sufficient for most plants, but this can vary depending on the plant species and your local climate.
Step 7: Finding the Perfect Spot
Your coffee mug planter is now ready to brighten up any space. Find a spot with appropriate light conditions for your plant. Most succulents prefer bright, indirect light, so a windowsill or a well-lit desk is ideal. I always put these small plant trays under my plants to keep my furniture dry.
Creative Ideas for Your Coffee Mug Planter
- Personalized Gifts: These planters make thoughtful, personalized gifts. You can customize the mugs with paint, stickers, or decals to suit the recipient’s taste.
- Themed Collections: Create a themed collection of planters for a windowsill or bookshelf. For instance, use mugs with different patterns or colors that complement each other.
- Herb Garden: Instead of decorative plants, consider using your coffee mugs to grow herbs. Basil, mint, and parsley are excellent choices for a kitchen herb garden.
Troubleshooting Common Issues
- Cracked Mug: If your mug cracks during the drilling process, don't despair. You can still use it as a decorative piece without drilling a hole or as a pencil holder.
- Overwatering: If you notice your plant's leaves turning yellow or mushy, it might be getting too much water. Ensure proper drainage and adjust your watering schedule.
- Root Bound Plant: If your plant outgrows the mug, gently remove it and transplant it into a larger pot. Replace it with a new small plant or succulent.
Repurposing old coffee mugs into a DIY coffee mug planter is a simple project that combines creativity with sustainability. With a little time and effort, you can transform an old mug into a charming home for your plants. Whether you keep it for yourself or give it as a gift, this upcycled planter is sure to bring joy and a touch of nature into any space.


